Here is one method that will let you use the same precompiled header (PCH) at the beginning of each module in your project. It will not help you if you want use a separate PCH with each module. I searched the forum and didn’t see any topics on this issue, but I apologize if I’m repeating old material.
This method is based on
this article from the wiki on using PCHs with the GCC. Unfortunately Visual C uses a different and incompatible method of handling PCHs, so we have to make a few changes.
Step 0) First we have to configure Code::Blocks to use precompiled headers with the Visual C compiler (otherwise it will simply refuse to compile headers at all.) From the main code blocks menu, select Settings->Compiler and Debugger. In the compiler settings dialog, select the Visual C compiler, hit the other tab and then hit “Advanced options…”
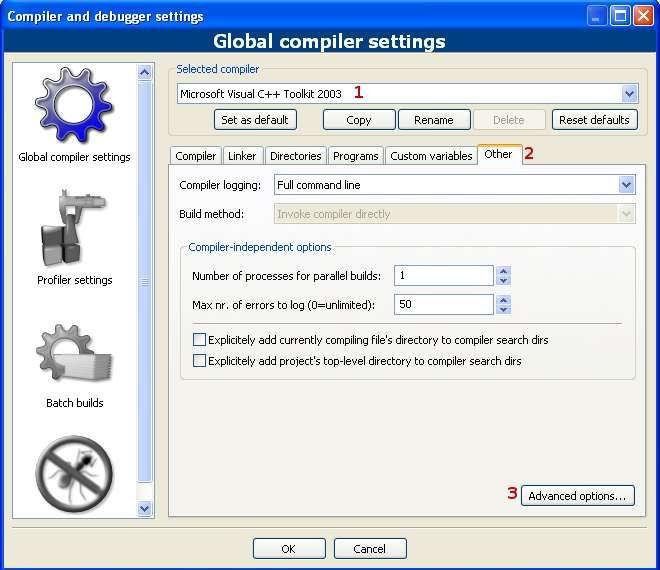
Select yes at the warning. Select the others tab and choose “supports PCH:”
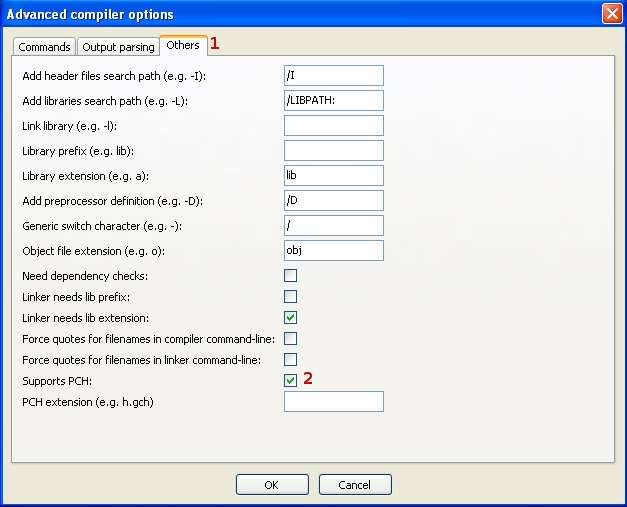
When finished, hit OK then Ok again.
Step 1) Pick out the header that will be placed at the beginning of each file. I’ll call it “wx_pch.h” since that the default name Code::Blocks uses, but you can call it anything you want. Add the file to your project if it’s not already included. The header should have this form:
 #ifndef WX_PCH_H_INCLUDED
#define WX_PCH_H_INCLUDED

//enter whatever is needed here.

#endif // WX_PCH_H_INCLUDED
You can use your own identifier instead of “WX_PCH_H_INCLUDED” but whatever identifier you use, it’s vitally important that the header begin with the lines “#ifndef <your identifier>” and “#define <your identifier>” and end with “#endif”.
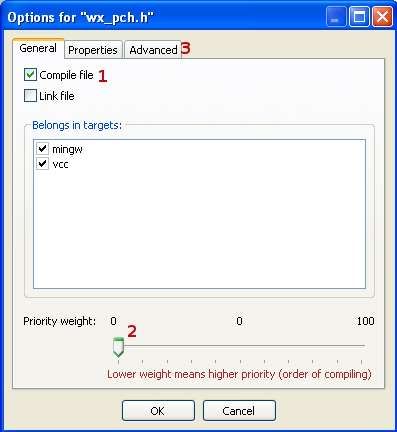
Step 2) From the project browser, right click on the header and select “Properties”. Make sure the file is set to compile but not link, set the priority to zero (ie it compiles first), and then select the advanced tab.
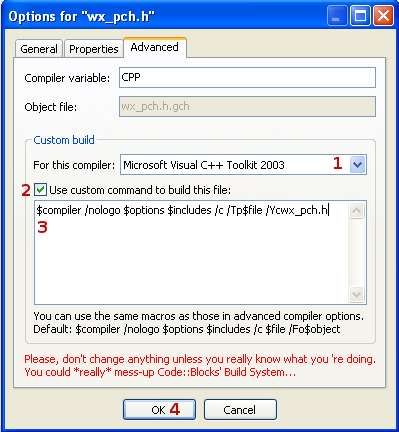
Step 3) Select the Visual C compiler, choose “Use custom command to build this file”, and enter “$compiler /nologo $options $includes /c /Tp$file /Ycwx_pch.h” (without the quotes) for the command. When you’re done, hit OK.
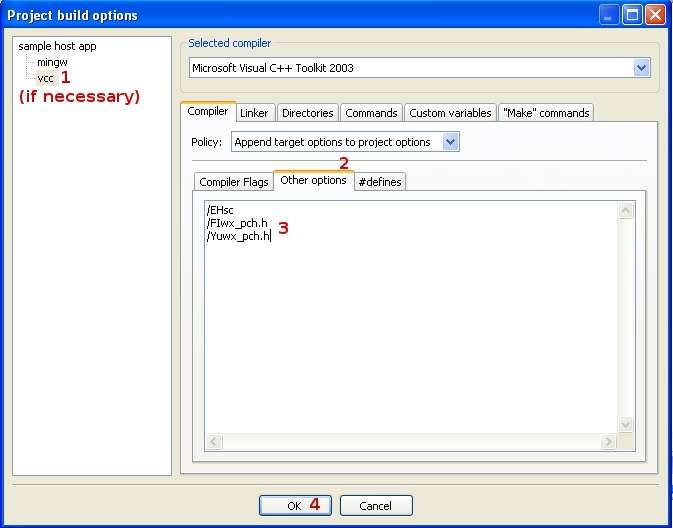
Step 4) From the main Code::Blocks menu, select Project -> Build Options. In the Build options dialog, select the target that is using the Visual C compiler (if necessary). Then from the compiler tab select “Other options”. Add the following two lines at the end of the other options “/FIwx_pch.h” and “Yuwx_pch.h” (without quotes) where you will have to replace “wx_pch.h” with the name of your header. When done, hit OK.
That should be it.


